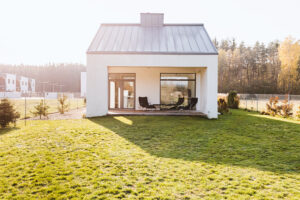
Expanding your home is an exciting opportunity to create more living space, improve functionality, and boost property value. However, a successful home addition requires careful planning and execution. Whether you’re interested in a small room expansion or a large-scale renovation, understanding the process is essential.
This step-by-step guide will walk you through everything you need to know about planning and building home additions in San Jose.
For an in-depth overview, check out the Essential Guide To Home Additions In San Jose, CA.
Step 1: Define Your Needs and Vision
Before starting your project, it’s important to determine why you need a home addition and what type of space will fulfill your needs. Consider how the addition will improve your lifestyle and complement your existing home.
Popular Home Addition Ideas:
- Room Addition in San Jose: Add an extra bedroom, home office, or playroom.
- Expanded Kitchen or Living Room: Create a more open, functional layout.
- Garage Conversions or ADUs: Turn unused space into a guest suite or rental unit.
- Sunrooms or Enclosed Patios: Enjoy year-round comfort with more natural light.
Having a clear vision helps guide design decisions and budgeting for your project.
Step 2: Set a Realistic Budget
Understanding the San Jose home addition cost is critical to planning your project. Costs can vary significantly depending on the type and size of the addition, materials, and labor.
Key Cost Factors:
- Home Extension Cost in California: Typically ranges between $250 to $500 per square foot.
- Permits and Fees: San Jose requires permits for most additions, which may include inspection fees.
- Material and Labor Costs: Custom finishes and specialty materials can increase costs.
- Contingency Budget: Set aside 10–20% for unexpected expenses.
Careful budgeting ensures your project stays on track without financial surprises.
Step 3: Understand Zoning Laws and Building Codes
Before beginning construction, it’s essential to understand San Jose’s zoning regulations and building codes. These rules dictate how and where your custom house addition in San Jose, CA can be built.
Considerations Include:
- Setback Requirements: Rules about how close the addition can be to property lines.
- Height Restrictions: Limits on how tall structures can be.
- Permits: Required for structural, electrical, and plumbing work.
- HOA Guidelines: Some neighborhoods have additional restrictions.
Partnering with a knowledgeable room addition contractor in San Jose ensures that your project complies with all local regulations.
Step 4: Hire a Qualified Contractor
Choosing the right contractor is one of the most important decisions you’ll make. A skilled contractor will help you navigate permits, design, and construction.
What to Look For in a Contractor:
- Licensing and Insurance: Confirm the contractor is properly licensed and insured in California.
- Experience with Home Additions in San Jose: They should understand local codes and zoning laws.
- Portfolio and References: Review past custom house additions in San Jose, CA projects.
- Transparent Pricing: Get a clear, detailed estimate.
Hiring an experienced contractor ensures high-quality work and a smooth building process.
 Step 5: Design Your Home Addition
Once you’ve chosen a contractor, the design phase begins. Collaborate with architects and designers to create a layout that blends seamlessly with your existing home.
Design Tips:
- Aesthetic Consistency: Match your home’s architectural style.
- Functionality: Prioritize how the space will be used.
- Energy Efficiency: Incorporate sustainable materials and energy-saving solutions.
- Future Resale Value: Make design choices that enhance property value.
A well-thought-out design prevents costly changes during construction.
Step 6: Obtain Necessary Permits
Securing the proper permits is essential for a legal and safe home addition. Your contractor will typically handle this step, but it’s good to understand the process.
Permits Typically Needed:
- Building Permit: Covers structural changes.
- Electrical and Plumbing Permits: Required for system upgrades.
- Zoning Approval: Ensures compliance with property regulations.
Skipping this step can lead to fines or project delays, so it’s important to follow the rules.
Step 7: Begin Construction
With designs finalized and permits secured, construction can begin. A reliable contractor will manage the entire process, including inspections and subcontractors.
Construction Phases:
- Site Preparation: Clearing the area and preparing the foundation.
- Framing: Building the structure for walls, floors, and the roof.
- Utilities Installation: Electrical, plumbing, and HVAC systems are added.
- Finishes: Painting, flooring, and final touches complete the addition.
Staying in regular communication with your contractor will help keep the project on schedule.
Step 8: Final Inspections and Move-In
After construction is complete, your home addition must pass final inspections to ensure safety and code compliance.
Final Steps:
- Punch List: Review the space for any last-minute fixes.
- Final Cleanup: Ensure the area is clean and ready to use.
- Inspection Approval: Once passed, your addition is officially complete!
Now you can enjoy your newly expanded space.
Why Choose Contos Builders for Your Home Addition?
Contos Builders is a trusted expert in home additions in San Jose, offering premium design and construction services. Whether you’re expanding your kitchen, adding a new room, or building a custom addition, Contos Builders delivers exceptional quality and craftsmanship.
For expert guidance, 📞 650-387-9533 or schedule a consultation today!